> For the complete documentation index, see [llms.txt](https://ceh-practical.cavementech.com/llms.txt). Markdown versions of documentation pages are available by appending `.md` to page URLs; this page is available as [Markdown](https://ceh-practical.cavementech.com/module-4.-enumeration/8.-enumeration-using-various-tools.md).
# 8. Enumeration using various tools
## 1. Enumerate using Global Network Inventory
Global Network Inventory is used as an audit scanner in zero deployment and agent-free environments. It scans single or multiple computers by IP range or domain, as defined by the Global Network Inventory host file.
{% embed url="" %}
Use it if every thing fails
{% endembed %}
1. After installation, open the tool. The **Global Network Inventory** GUI appears. Click **Close** on the **Tip of the Day** pop-up.

2. The **New Audit Wizard** window appears; click **Next**.

3. Under the **Audit Scan Mode** section, click the **Single address scan** radio button, and then click **Next**.
> You can also scan an IP range by clicking on the **IP range scan** radio button, after which you will specify the target IP range.

4. Under the **Single Address Scan** section, specify the target IP address in the **Name** field of the **Single address** option (in this example, the target IP address is **10.10.1.22**); Click **Next**.

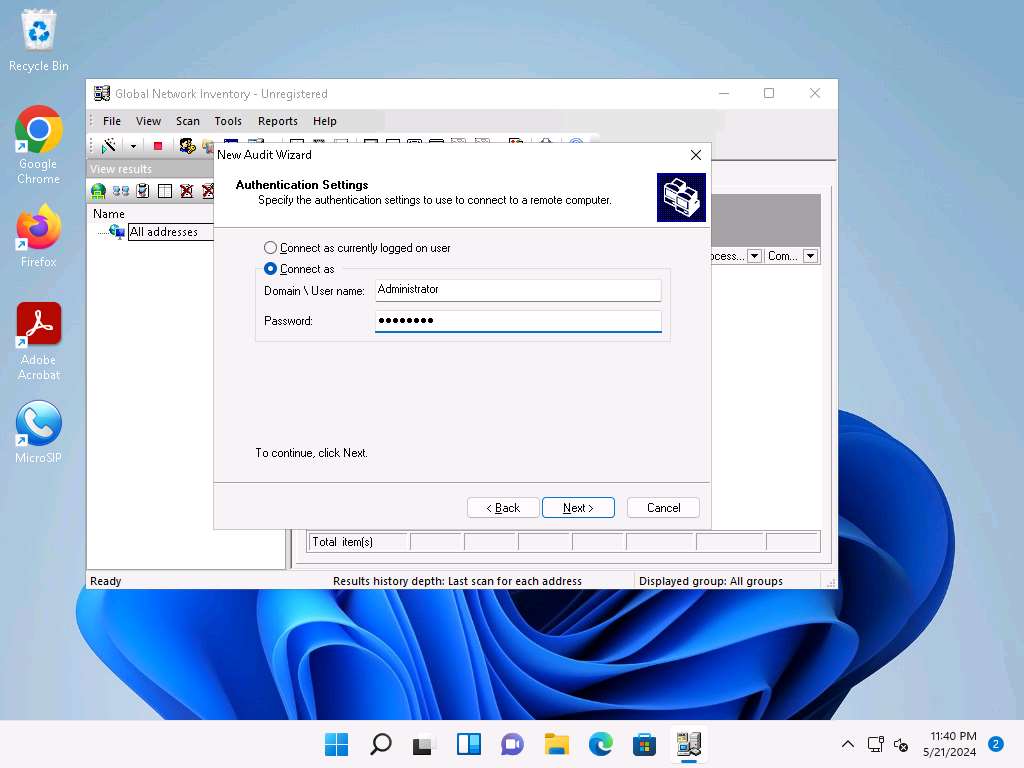
5. The next section is **Authentication Settings**; select the **Connect as** radio button and enter the **Windows Server 2022** machine credentials (Domain\Username: **Administrator** and Password: **Pa$$w0rd**), and then click **Next**.
> In reality, attackers do not know the credentials of the remote machine(s). In this situation, they choose the **Connect as currently logged on user** option and perform a scan to determine which machines are active in the network. With this option, they will not be able to extract all the information about the target system. Because this lab is just for assessment purposes, we have entered the credentials of the remote machine directly.
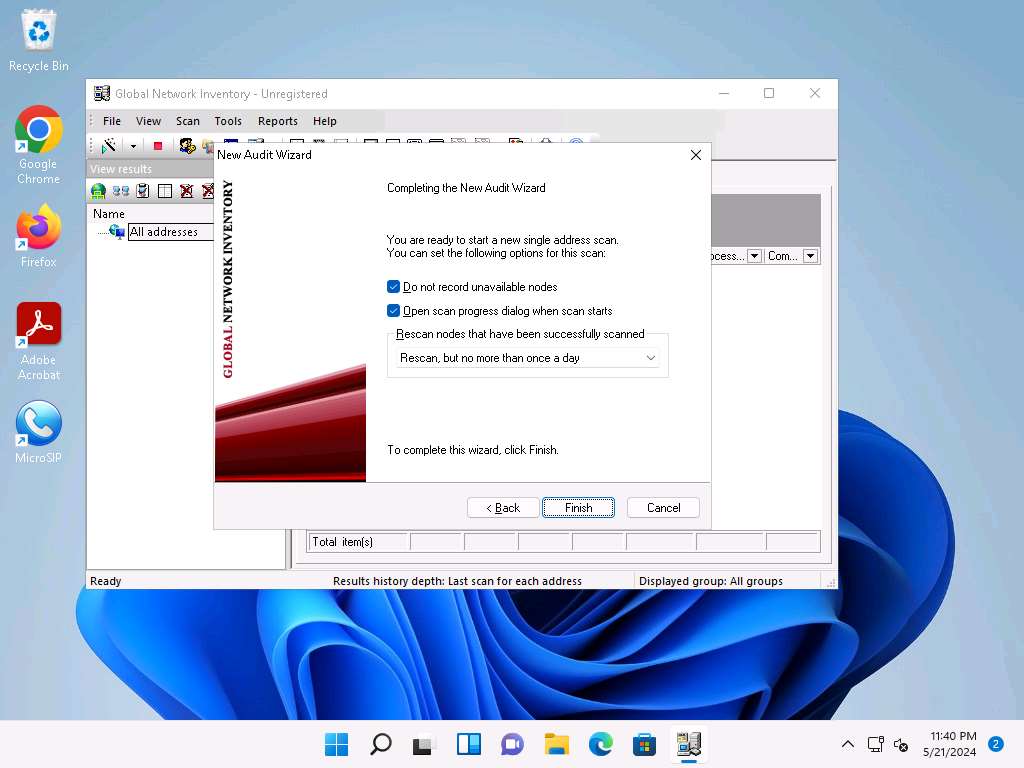
6. In the final step of the wizard, leave the default settings unchanged and click **Finish**.
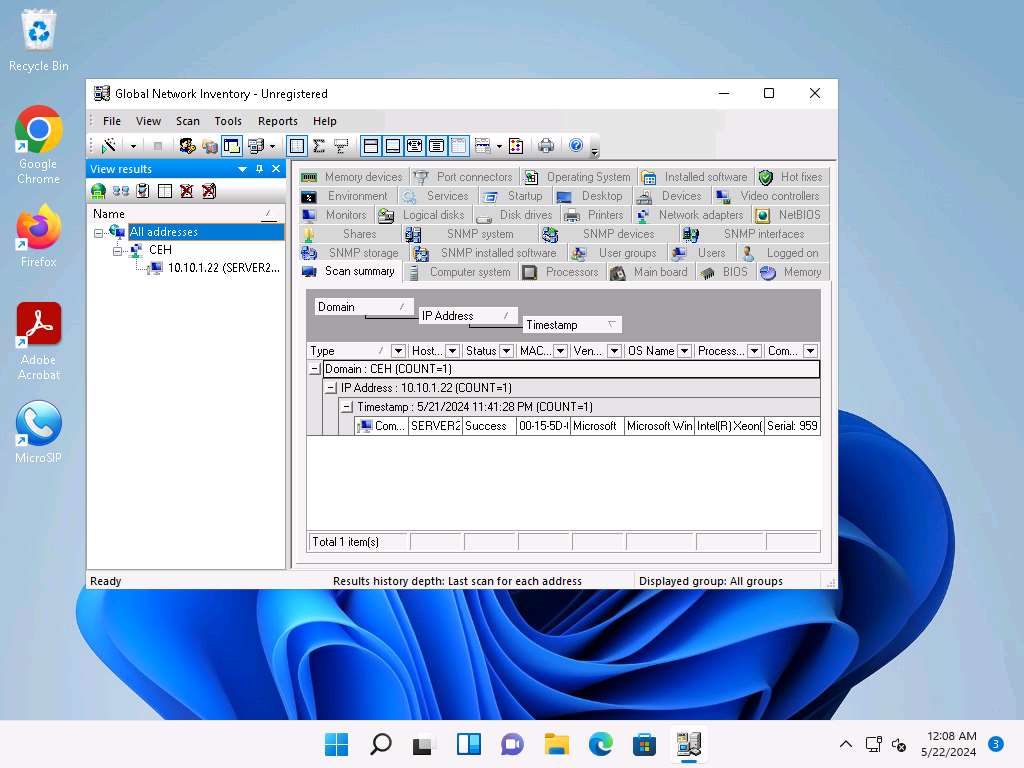
7. The **Scan progress** window will appear.

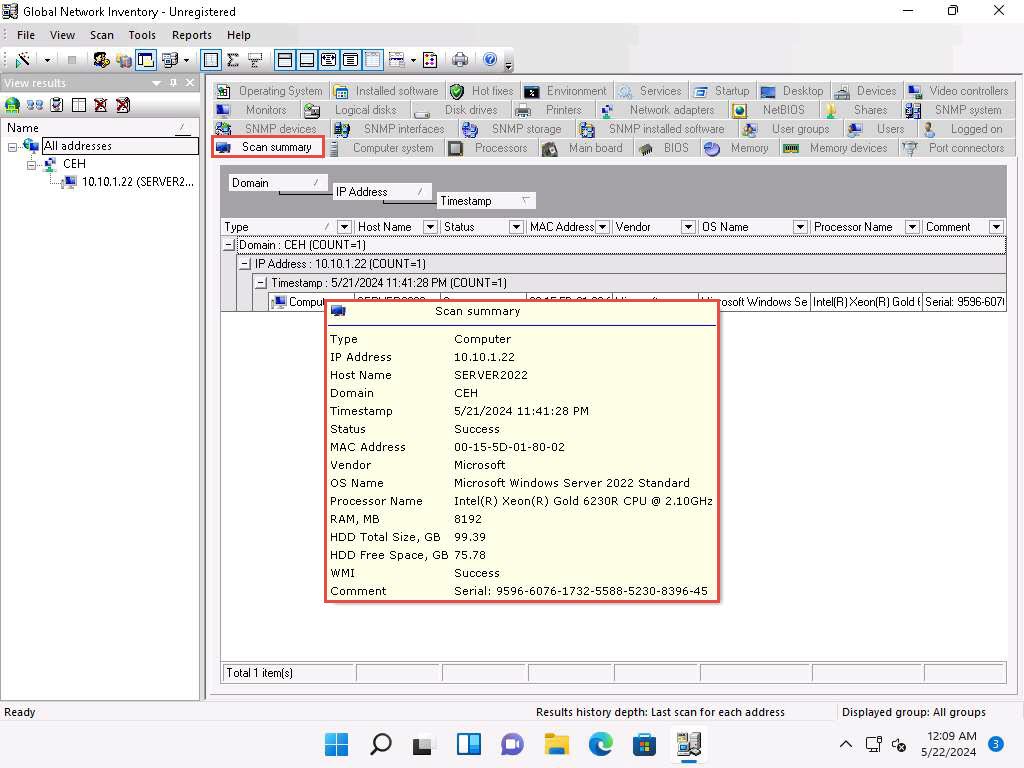
8. The results are displayed when the scan finished. The **Scan summary** of the scanned target IP address (**10.10.1.22**) appears.
> The scan result might vary when you perform this task.
9. Hover your mouse cursor over the **Computer details** under the Scan summary tab to view the **scan summary**, as shown in the screenshot.
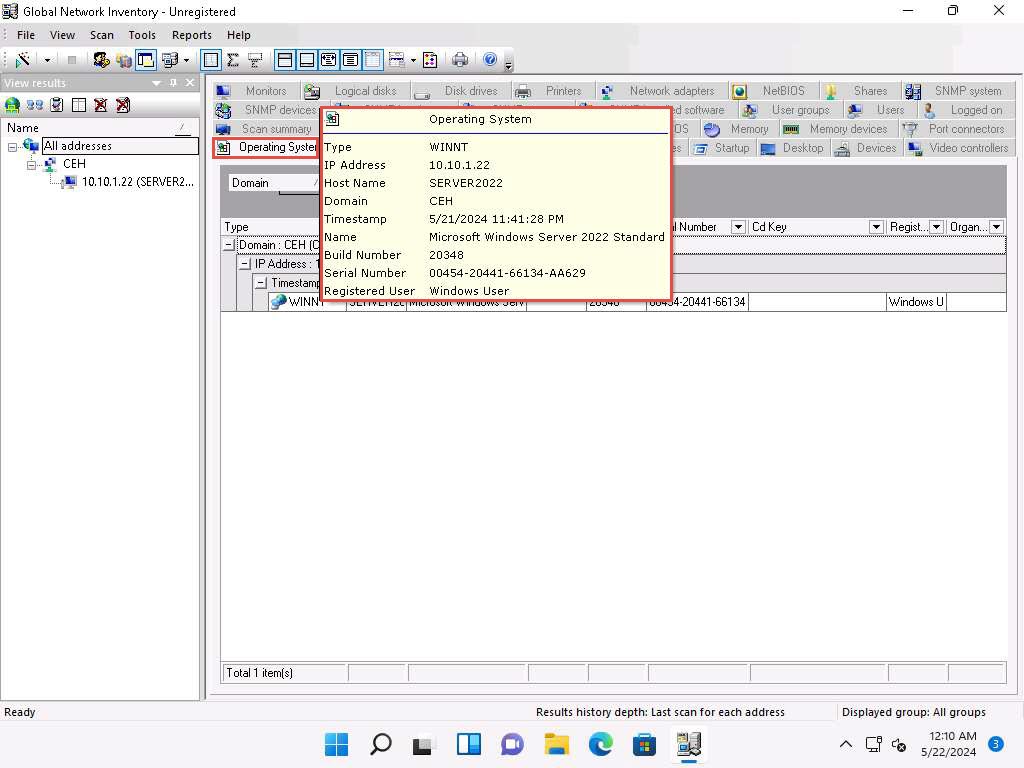
10. Click the **Operating System** tab and hover the mouse cursor over **Windows details** to view the complete details of the machine.
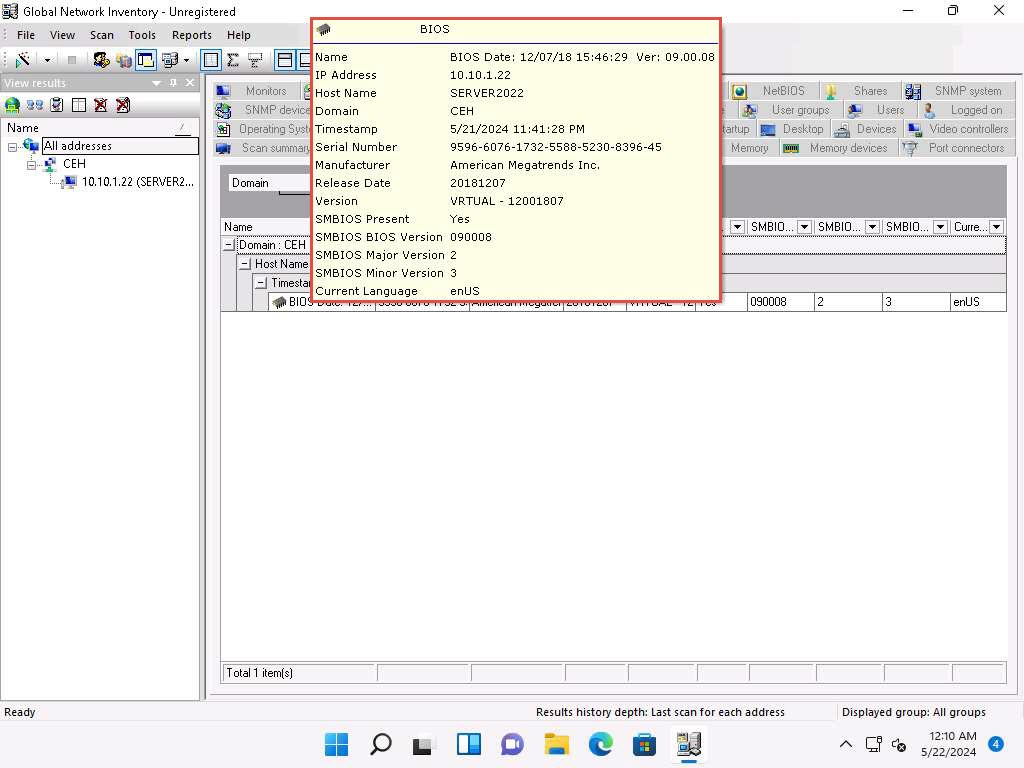
11. Click the **BIOS** tab, and hover the mouse cursor over windows details to display detailed BIOS settings information.
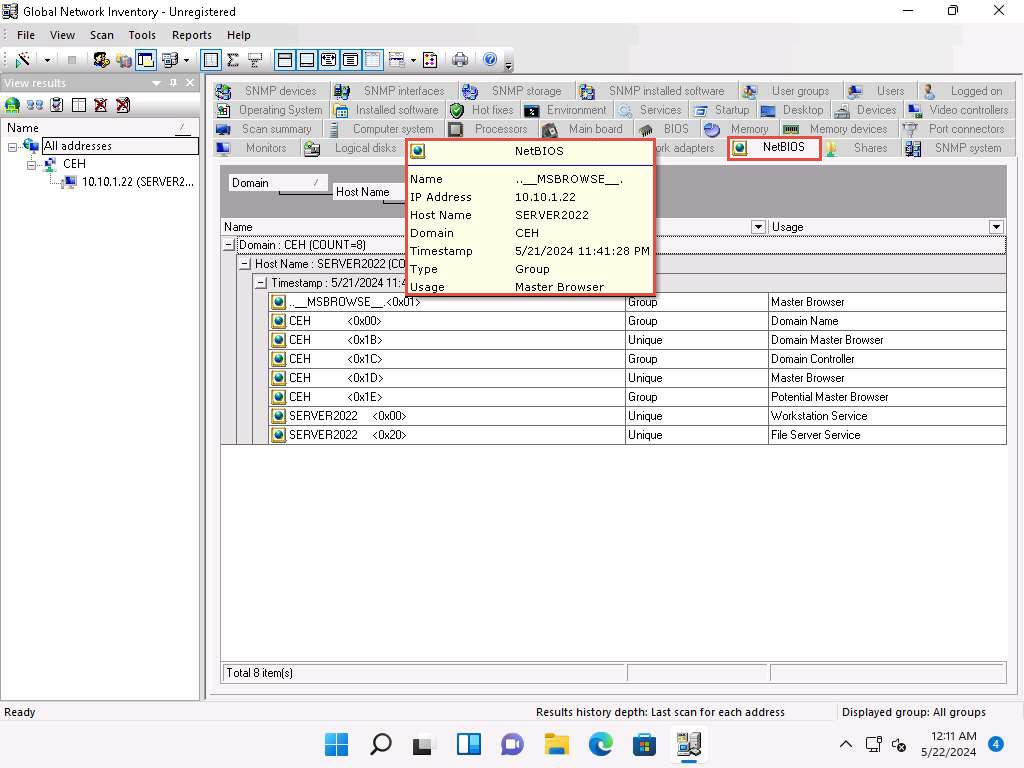
12. Click the **NetBIOS** tab, and hover the mouse cursor over any NetBIOS application to display the detailed NetBIOS information about the target.
> Hover the mouse cursor over each NetBIOS application to view its details.
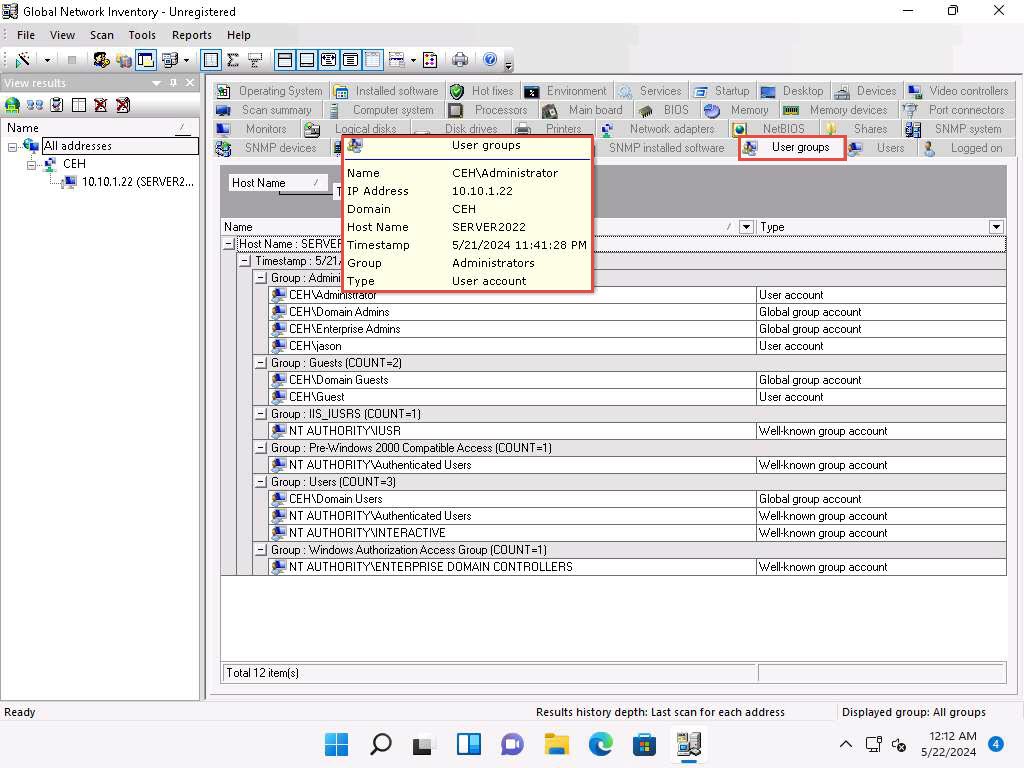
13. Click the **User groups** tab and hover the mouse cursor over any username to display detailed user groups information.
> Hover the mouse cursor over each username to view its details.
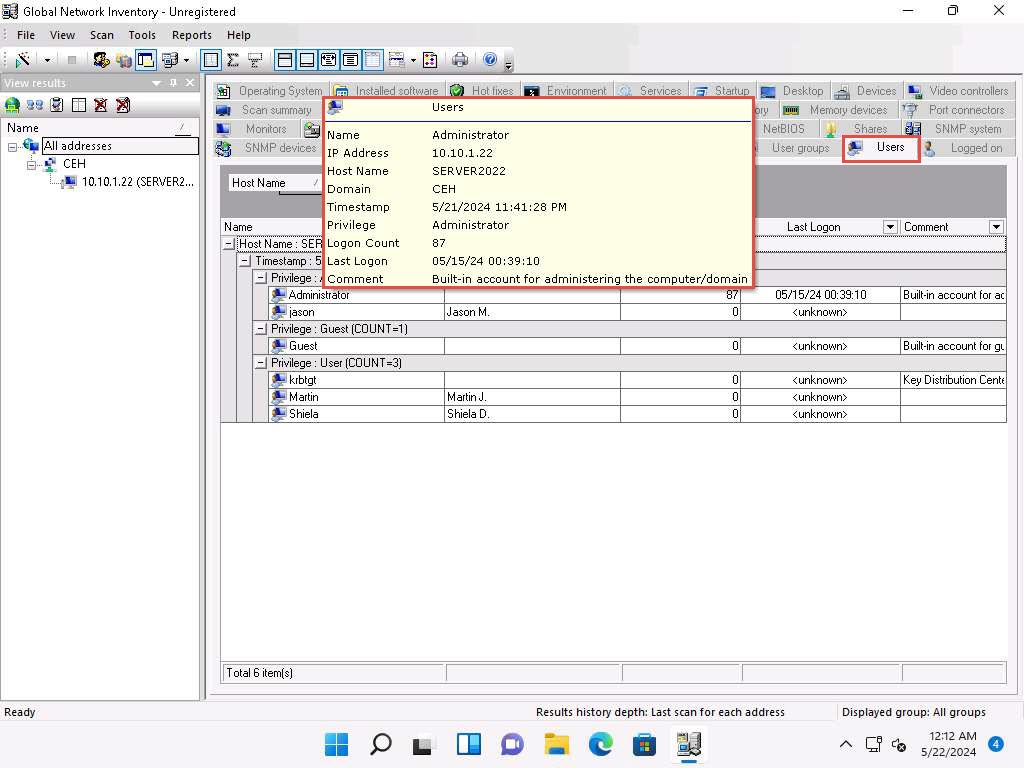
14. Click the **Users** tab, and hover the mouse cursor over the username to view login details for the target machine.
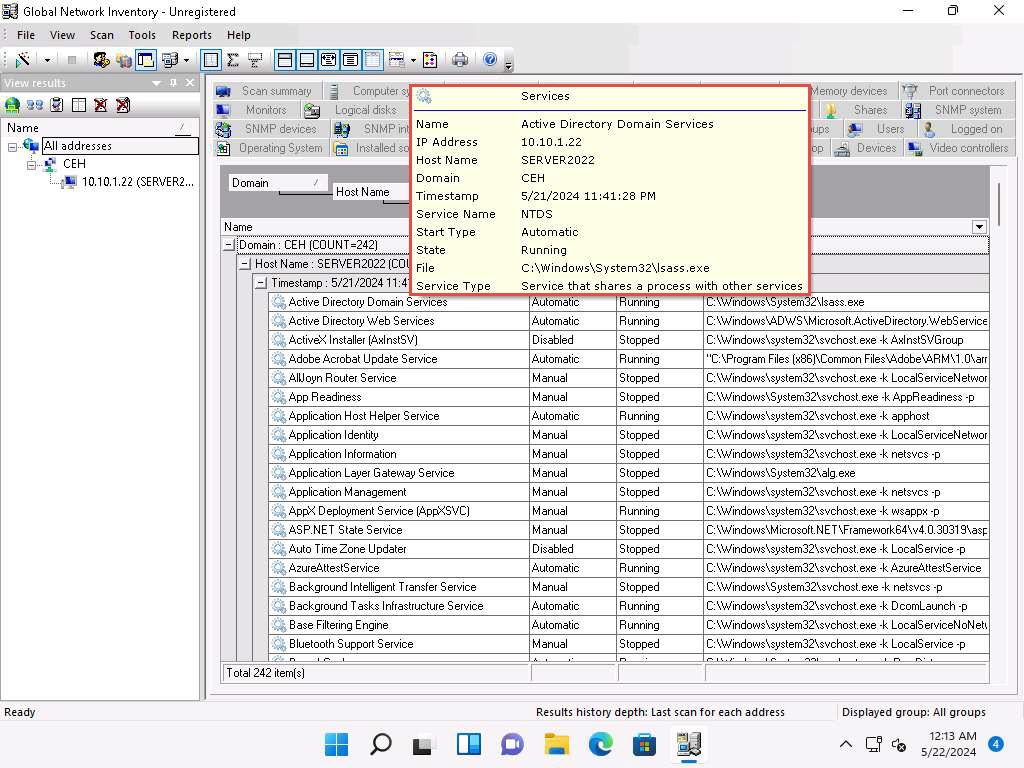
15. Click the **Services** tab and hover the mouse cursor over any service to view its details.
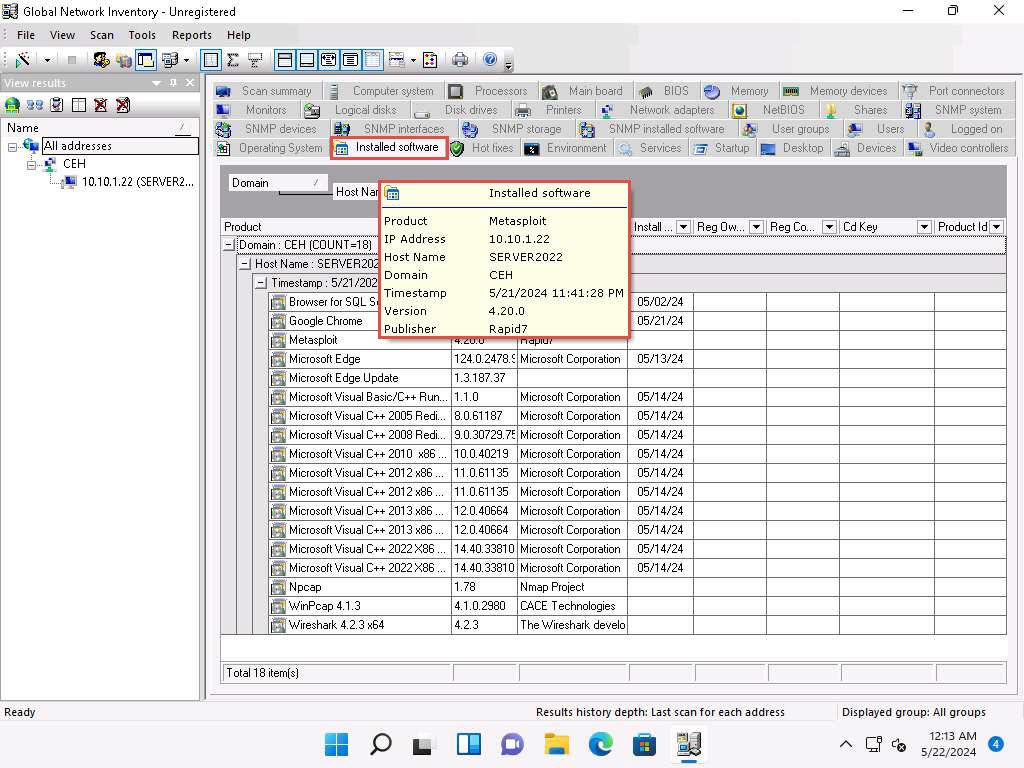
16. Click the **Installed software** tab, and hover the mouse cursor over any software to view its details.
17. Click the **Shares** tab, and hover the mouse cursor over any shared folder to view its details.

18. Similarly, you can click other tabs such as **Computer System**, **Processors**, **Main board**, **Memory**, **SNMP systems** and **Hot fixes**. Hover the mouse cursor over elements under each tab to view their detailed information.
## 2. Enumerate using angry IP scanner
{% embed url="" %}
## 3. Enumerate using Enum4Linux from samba and Windows hosts
enumerate netbios name
```
enum4linux -u martin -p apple -n 192.168.18.110
```
{% hint style="info" %}
-n netbios
-U get usernames
-M get machine list\*
-S get sharelist
-P get password policy information
-G get group and member list
{% endhint %}
Enumerate everything
```
enum4linux -a 192.168.18.110
```
{% embed url="" %}